I recently completed the Insight Data Science program, which involved the creation of a data science project from ideation through deployment (if interested, you can see my Insight project here). For deployment, a Flask webapp was created, and Amazon Web Services (AWS) was used to host it. I found that getting this all set up was one of the hardest things for fellows to accomplish, and recognized a few areas in which it could be improved.
The instructions below are an attempt to improve the instructions for getting a Flask webapp up and running on AWS. While I assume no prior knowledge of Flask, I do no go into any Flask basics here, but that may be a blog post for the future. I will try to go slowly through the steps, and offer plentiful code examples and screenshots. This guide will hopefully serve as a better reference for future Insight sessions.
Creating an AWS Instance
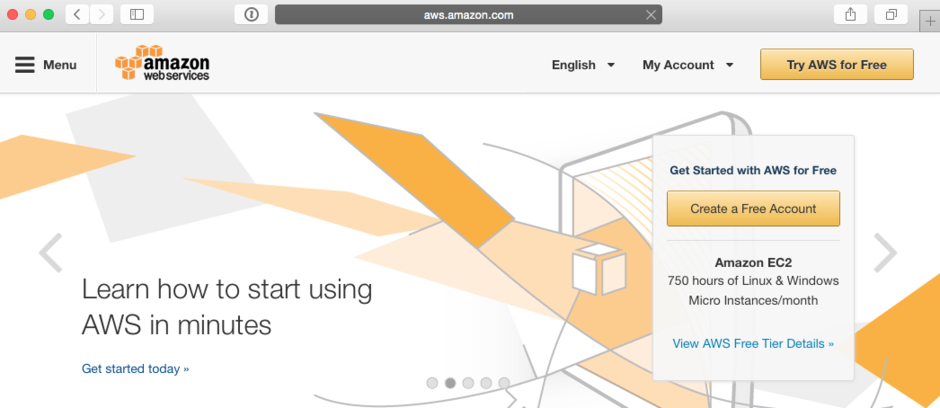
First, we must create an AWS virtual machine to copy our files to, and serve our website. To get started, head to aws.amazon.com and click the sign up button in the top right. Then, follow the steps to either sign into your existing Amazon.com account, or create a new one.
Unfortunately, I already went through the signup process, so I could not recreate some of the screens. I know you will have to enter your credit card information, but don't worry, we will only be using the free AWS tier, so you will not be charged. I believe AWS will also ask you what region you want your servers to be in. For convenience, select one of the western US options (I chose Oregon).
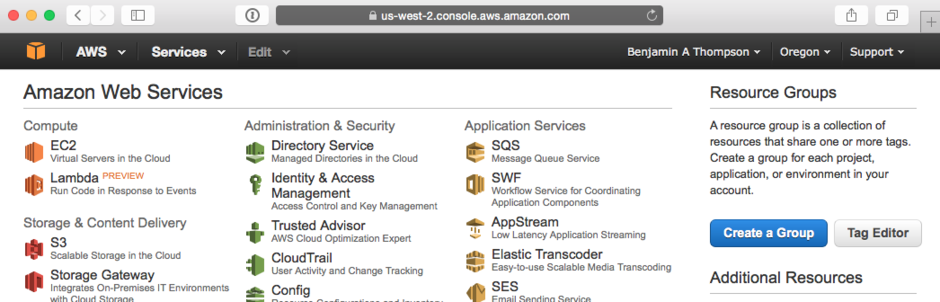
After completing signup, you will be presented with the AWS console screen, with all the products AWS has to offer. What we want to select is EC2, or Elastic Compute Cloud, the first option in the top left.
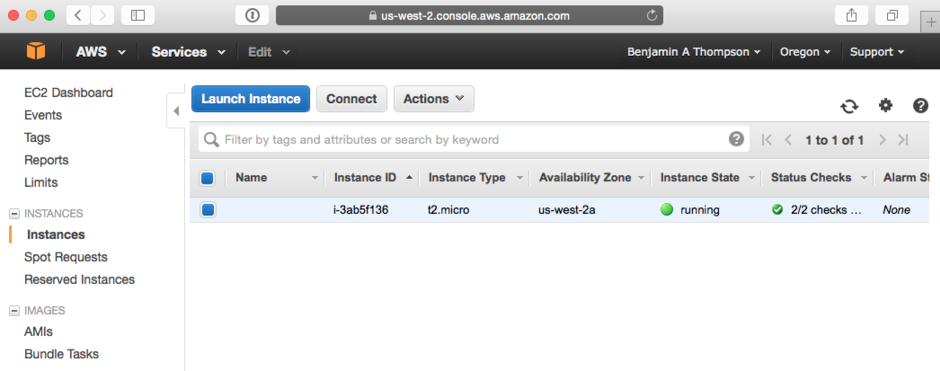
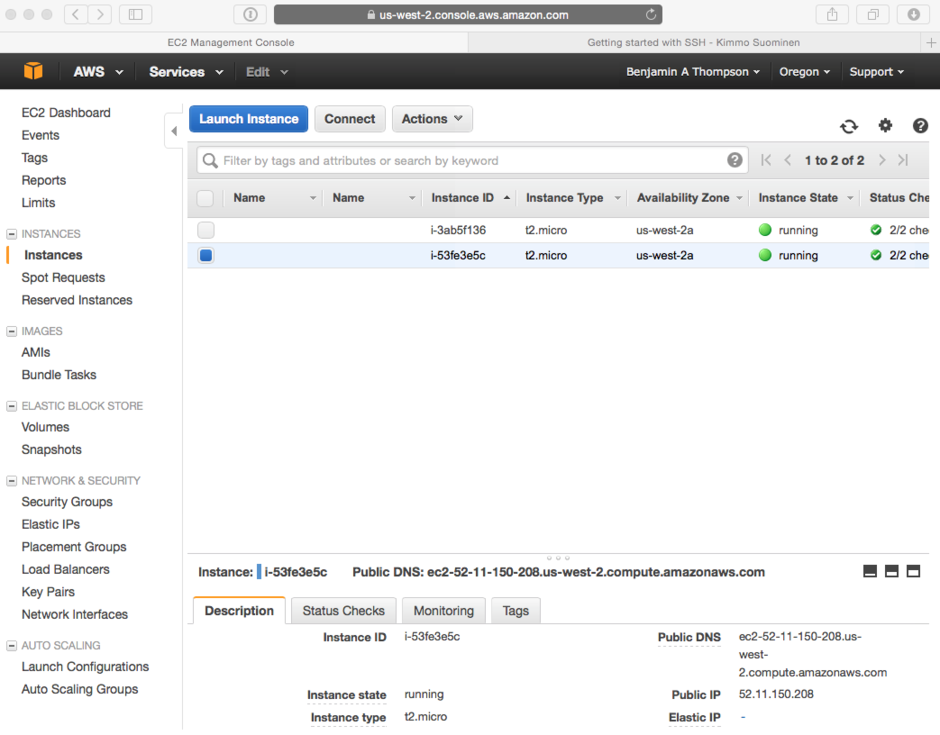
After selecting EC2, you will be presented with the EC2 console screen, which can also be overwhelming with the number of options to choose from. To get started, select the "Instances" tab on the left sidebar (under the Instances subheader), which will take you to the following screen:
I already have an instance created for my project, but the list you will see will be empty. Press the blue "Launch Instance" button to set up a new virtual machine for your project. You will immediately be asked to select an operating system, and you should select the "Ubuntu Server" option. As of this writing, the current version is 14.04, but these instructions should still work on future versions.
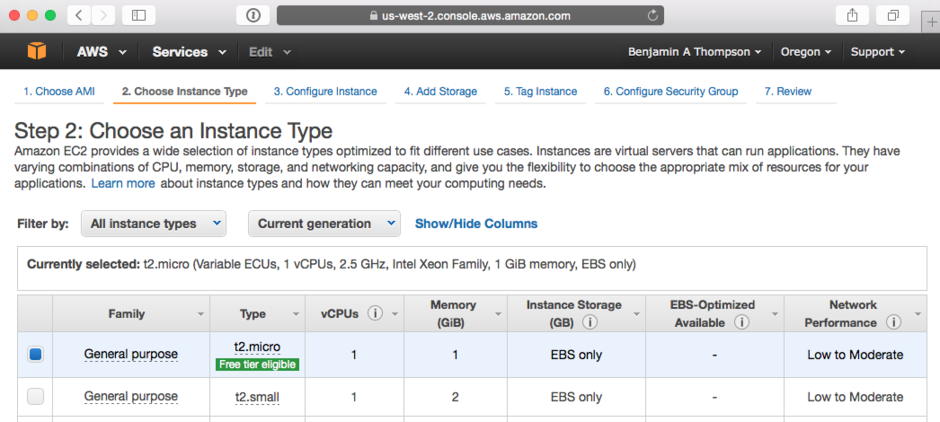
Next, you will select what type of instance you wish to create. For the free tier, there is only 1 option available, but there are many beefier virtual machines you could create if you wish to pay for the performance.
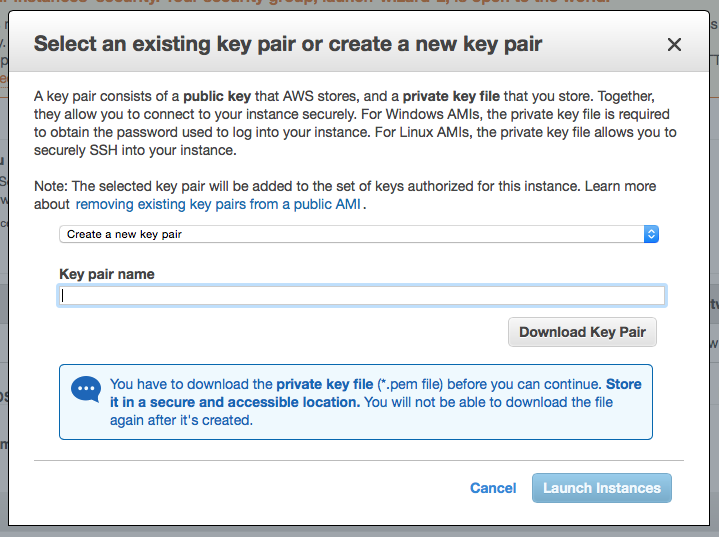
Continue through the setup, just clicking the blue continue buttons, until you reach the review step. At this stage, AWS will ask you to create a "key pair," that you will use to SSH into your instance.
Give it any name you wish ("aws" might be a good name), and click the "Download Key Pair" button. This will download a text file which contains the SSH key necessary to access the instance. Make sure to back this key file up! If you ever lose your key file, you will not be able to enter your instance. Your data will be recoverable, but it will be hassle, and should be avoided at all costs.
Once the key is downloaded, click the "Launch Instances" button, which should now be available.
Setting Up SSH
Before we worry about setting our files up on the instance, we should make sure we have easy access to log into the machine.
First, we need to determine where our virtual machine is. To find your instance's IP address, click back to the "Instances" tab, and select your instance. In the bottom right will list the IP address of the machine:
We can now use this IP address to log in via SSH. Normally, the login requires a lengthy SSH command:
These commands get even more unwieldy when you try to copy files with scp or create port tunnels (more on that later). To simplify all future steps, we will create an SSH alias.
Within your home folder is a hidden directory, .ssh. Within this directory are all the configuration files for SSH connections. As a first step, copy your downloaded *.pem file to the ~/.ssh directory. Note: on a Mac, the key is sometimes downloaded as a .pem.txt file. Remove the .txt extension before copying.
We will also need to change the permissions of the downloaded *.pem file. The key must be unreadable by other users in order to be considered; if it is readable by others it may pose a security risk. To alter the permissions, use the chmod function:
chmod 600 ~/.ssh/keyfile.pem
Now that the key file is in the right location, and with the right permissions, we can create our alias. to do this, we want to edit the ~/.ssh/config file, which may or may not already exist on your system. Simply run emacs ~/.ssh/config (or another editor of your choice) to create / edit the file. Add the following entry, substituting the IP address of your instance, and the exact name of your key file:
Host aws
HostName 52.11.150.208
User ubuntu
Port 22
IdentityFile ~/.ssh/aws.pem
Once the steps are complete, open a new terminal window, and you should be able to access your machine via the simple command:
ssh aws
If this command fails for any reason, double check you completed steps 1 and 2, or troubleshoot the given error (perhaps you entered the wrong name for your keyfile, etc.). Once you can log into your machine, we can proceed.
Setting Up The Instance
When you enter the instance, it is essentially a blank slate: only a bare-bones Python installation, no packages, and no Flask. We will install the basic components necessary to get a dummy Flask app running before copying over any completed project you may have working locally.
Python is already installed, but none of the add-on packages. We will want to speed up this process with pip. It can be installed via:
These commands will do a bunch of things, and exit with pip now installed for use. Next, we will install Flask to get our bare-bones dummy example working
sudo pip install flask
The $PYTHONPATH variable seems to get unset randomly, and causes errors for later steps. To avoid this, add the following line to the top of your ~/.bashrc file:
This will create a folder, dummyapp, which will contain all the pieces of our dummy Flask application. A similar process can be followed to put your project webapp into a single folder.
Next, we will create the necessary python and HTML files for our skeleton app. Remember, to create any file, simply run emacs [filename], or any other command line text editor. The names of the following files will be the first line of the code, in a comment:
# dummyapp/app/views.pyfromflaskimportrender_templatefromappimportapp@app.route('/')defindex():returnDict={}returnDict['user']='Ben'# Feel free to put your name here!returnDict['title']='Home'returnrender_template("index.html",**returnDict)
<!-- dummyapp/app/templates/index.html --><html><head><title>{{ title }} - microblog</title></head><body><h1>Hello, {{ user }}!</h1></body></html>
fromappimportappapp.run()
Once all the files are in place, you should be able to run the app with python run.py from the main ~/dummyapp/ folder. However, the default port 5000 is blocked, so you won't be able to see it from the outside. To do this, logout of the virtual machine and create a port tunnel from your local machine:
ssh -L 5000:localhost:5000 aws
This command takes port 5000 on your local machine, localhost, and binds it to port 5000 on aws. It also SSH's to aws so that you can run the dummy Flask app from there. Running it this time, and navigating your browser to localhost:5000 should give you the "Hello [Name]" message, and you should see a line print in your terminal from a generic GET command. Once you've verified the dummy app is working, we can move onto making it persistent.
Installing Nginx
To keep our Flask app running constantly and make sure it can serve a decent number of concurrent users, we will use Nginx, a webserver. It will handle passing traffic from your instance to the Flask web process. To install it, simply run:
sudo apt-get install nginx
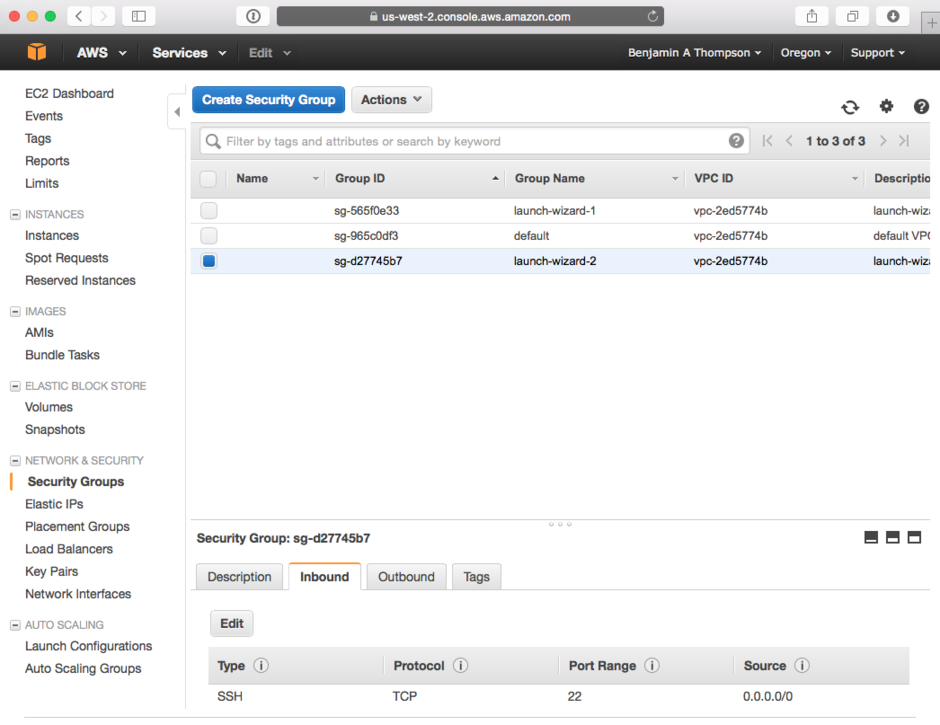
Once installed, the webserver is automatically running. To check whether it's working, we'll have to open up the necessary ports to pass HTTP requests to the virtual machine. To do this, go back to the EC2 console and select the "Security Groups" option in the sidebar, select your instance, then click the "Inbound" tab at the bottom of the page.
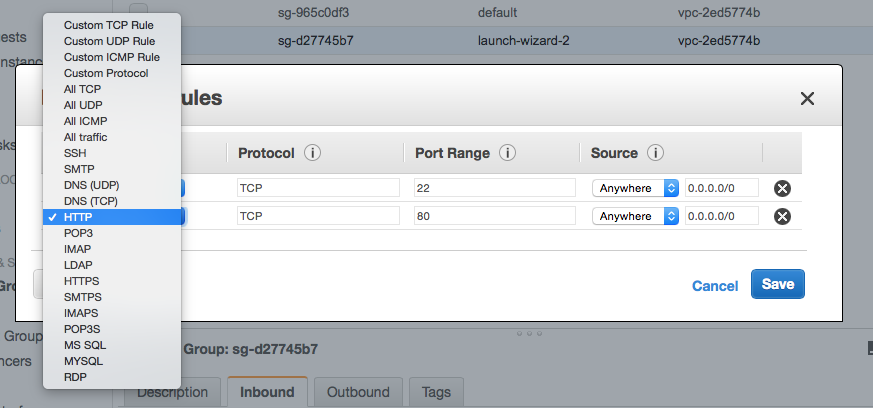
Click the "Edit" button in the Inbound tab, then add a new rule. Select HTTP from the dropdown menu, and it will automatically open port 80 on your virtual machine.
Once the port has been opened, navigate your browser to your instance's IP address, and you should be greeted by an Nginx welcome message. This message means that the webserver is working, and is ready to be hooked into your Flask app.
Configuring uWSGI
To hook flask into Nginx, we will be using the python package uWSGI. uWSGI is an alternate web process from the default one used by Flask that makes it easier to connect to Nginx. Unfortunately, the pip installation of this module always seems to fail, so we use apt-get instead:
Next, we need to make a configuration file so that uWSGI knows the parameters of the Flask app it is serving. To do this, we create a parameter file, which usually has the .ini suffix. For our example, we can create a uwsgi.ini file in the dummyapp/ folder, containing the following:
Before moving on, I will explain some of the options above:
home defines the home directory of the app. This becomes a variable in some of the other options.
wsgi-file defines the file that should be run to start the web process. This is, for almost everyone, run.py.
socket defines a port on the virtual machine that will pass information between uWSGI and nginx. The port number can be almost anything, as long as it is not used by another program. I recommend using ports 3301-3306, which should be unused by anything else.
module defines the name of the folder containing views and templates, in most cases app/. If you name your folder something else, change this entry to that name.
daemonize defines the path to the log file for the Flask app. All lines printed to the console during a normal run of your app will be printed to this file instead. This will allow you to see any error messages or diagnostic print statements in your code.
pidfile defines the path to a file containing the process ID of the uWSGI process. This file will be used to stop the server when something needs to be changed.
Once the uWSGI configuration file is finished, we will have to configure nginx to accept traffic from uWSGI. The configuration file for nginx is located at /etc/nginx/nginx.conf. The main block you'll want to edit is the http one, which you should modify to look something like this:
Most of the settings at the top should not need to be changed from whatever they were for the default, but the important block is the server entry at the bottom. This tells nginx to "listen" on port 80 (the default HTTP port), and pass all that information to uWSGI on port 3033 (make sure to change this port to whatever you specified in the UWSGI config file).
Now that we have updated nginx to use the correct parameters, we need to restart it so it re-reads the config file. Do this with:
sudo service nginx restart
You should see an [OK] message, which means that nginx was restarted successfully. Now we need to start the uWSGI process to finish everything off. To do this, simply run:
uwsgi ~/dummyapp/uwsgi.ini
Now if you point your browser to the IP address of your instance, you should see the hello message from your dummy Flask app. If you do, congrats, you're (almost) done!. If not, check the log file (~/dummyapp/dummyapp.log) to see what problems have arisen. Google those error messages to troubleshoot. To stop the uWSGI process, run:
uwsgi --stop ~/dummyapp/dummyapp.pid
Now that you had a dummy app working, you can begin to copy over your completed app. Make sure to test it before starting into deployment. Run the app interactively first, by calling the run.py file and checking to see if there are any errors. Most likely, you will have to install many supporting python packages, or recreate your database before the app will run, without complicating the process with uWSGI and nginx.
After the app is working locally, make sure to create a tunnel on port 5000 and play around with using it. Make sure the app behaves in a reasonable manner, as you will be able to see the error messages easily. Once you've confirmed that most functionality is working, recreate the uWSGI configuration file, and start the uWSGI process.
Notes
One import note on uWSGI is that it does not reload upon changes to your Flask app. If you copy down a new version from github, or make edits to the code locally, you will have to stop and start the uWSGI process for the changes to become live. While this seems strange at first, it is helpful if you accidentally mess something up; your live app won't see the issue, and you'll have time to fix things, or roll back, if necessary.
Nginx allows you to do many advanced and nice things, such as subdomains. If your main site is running at example.com, you would be able to create another flask app, pass it through a different port to nginx, and serve that app on another.example.com. This allows you to use your single AWS instance for a whole host of side projects, which is not possible with other Flask web servers.
Hopefully this walkthrough was easy to follow and understand, and you now have at least a dummy app, but your full project working on AWS. In the near future, I'll be adding a few more Flask and AWS tricks to this blog, so stay tuned.